Moving a server sounds simple. Copy the files, move the database, point the domain, done. In practice, it rarely goes that way.
The essential server migration steps are: assess the current server, plan the move, prepare the new server, back up everything, transfer the data, test the new environment, switch DNS, monitor performance, and keep a rollback plan until you are sure it works. Skip one, and you risk downtime, lost data, or a broken site.
This guide walks through each step in plain English. I’ll use one running example: a business site on Ubuntu Server with NGINX and MySQL moving to a new VPS. You can adapt the same approach to Windows Server, PostgreSQL, or a cloud move.
What Is Server Migration?
Server migration is the process of moving data, applications, databases, and settings from one server to another. You assess the current setup, prepare the new server, transfer everything, test it, and then switch traffic over. (For the general concept, see the Wikipedia entry on data migration.)
1. How Does Server Migration Work?
Think of it like moving house. You don’t carry boxes to the new place and hope for the best. You list what you own, pack carefully, check the new place is ready, and only then hand back the keys.
Server migration works the same way. The old server keeps running while you build and test the new one. You only redirect users once the new server proves itself.
2. Why Do Businesses Need Server Migration?
Most migrations come down to a few common reasons:
- Aging hardware that is slow or close to failing.
- Performance limits when traffic outgrows the current server.
- Security needs, such as an operating system that no longer gets updates.
- Cloud adoption to gain flexibility and easier scaling. Businesses considering infrastructure upgrades should also understand the benefits of moving business infrastructure to the cloud, including improved scalability, resource flexibility, and reduced hardware dependency.
- Cost changes, such as moving to a cheaper or better-suited provider.
3. What Are the Different Types of Server Migration?
| Migration Type | What It Means |
| P2P (physical to physical) | Old physical server to a new physical server |
| P2V (physical to virtual) | Physical server to a virtual machine |
| V2V (virtual to virtual) | One virtual machine or hypervisor to another |
| On-premises to cloud | Local hardware to a cloud platform |
| Cloud to cloud | One cloud provider to another |
| OS or database migration | Same hardware, but a new operating system or database engine |
P2P is common when replacing old hardware. P2V and V2V are popular because virtual machines are easier to copy and resize. Cloud moves add more planning around networking, identity, and cost.
Many real projects mix these types. A company might move from a physical server to a cloud VM and upgrade the database version at the same time. More changes at once mean more risk, so split them up when you can.
9 Essential Server Migration Steps
1. Assess Your Existing Server Infrastructure
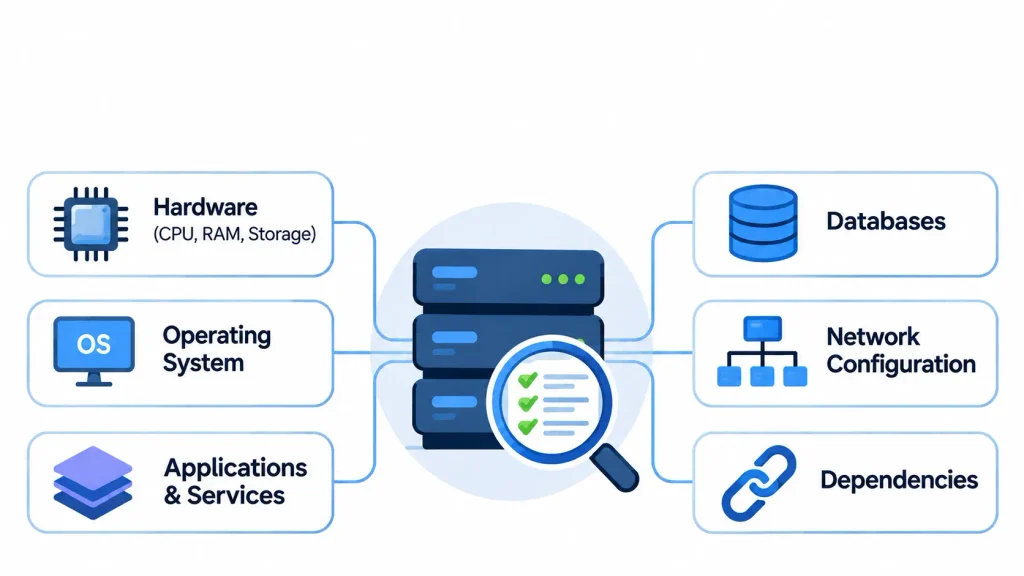
You can’t move what you haven’t mapped. Start by documenting exactly what runs on the old server.
In our example, that means NGINX, PHP, MySQL, a few cron jobs, an SSL certificate, and an outbound email service.
| Component | What to Assess |
| CPU | Average and peak usage |
| RAM | Typical consumption and swap use |
| Storage | Used space, growth rate, and disk speed |
| Operating system | Version and end-of-support date |
| Applications | Versions, modules, and dependencies |
| Network | IP addresses, open ports, and routes |
| Security | Firewall rules, SSH keys, and user accounts |
Pay special attention to hidden dependencies. These are the things nobody remembers until they break: a cron job that sends invoices, an IP allowlist at a payment provider, or a license tied to the server’s IP address.
A few commands that help on Linux:
bash
lsb_release -a # OS version
systemctl list-units –type=service –state=running
crontab -l # scheduled jobs for the current user
ss -tulpn # listening ports and services
df -h # disk usage
2. Develop a Detailed Server Migration Strategy
A plan turns a risky weekend into a routine task. Write down the goal, the method, the timeline, the owners, and the budget.
Choose the right migration method. A simple “lift and shift” copies the server mostly as it is. It is faster, but it carries old problems along. A rebuild on a fresh server takes longer, but you leave behind years of clutter. For most small and mid-sized sites, I prefer a clean rebuild.
Create a timeline and risk plan. Pick a low-traffic window for the final cutover. List what could go wrong, such as a slow transfer, a version mismatch, or a failed DNS change, and decide your response in advance.
Your strategy document should answer these questions:
- What is the target infrastructure, and why?
- Who does what, and who approves the final switch?
- What is the maximum downtime the business can accept?
- What conditions trigger a rollback?
- How will customers and staff be told?
3. Prepare the Destination Server
Build the new server before you move any data. The goal is a clean, secure environment that matches what your application needs. Internal Link Insertion 1
Businesses upgrading outdated infrastructure may also consider enterprise system modernization to improve application compatibility, performance, and scalability during migration.
For our example VPS:
- Install the same major OS version, or a newer supported one.
- Create a non-root user and set up SSH keys.
- Install NGINX, PHP, and MySQL at compatible versions.
- Apply security updates.
- Set a hostname and time zone that match the old server.
Configure the network and security settings. Set up the firewall, allow only the ports you need, and disable password logins over SSH if you can. On Ubuntu, ufw is a simple option:
bash
sudo ufw allow OpenSSH
sudo ufw allow ‘Nginx Full’
sudo ufw enable
Install required applications and dependencies. Match PHP extensions, database settings, and web server configuration. A version gap here is one of the most common causes of a broken site after migration. Copy your NGINX config files and test them:
bash
sudo nginx -t
4. Create and Verify Complete Server Backups
A backup you haven’t tested is only a hope. Create full backups before you touch anything, and store at least one copy away from both servers.
Back up:
- Website and application files
- Databases
- Server configuration files (NGINX, PHP, cron)
- SSL certificates and keys
- Environment files and credentials (stored securely)
Full backup vs incremental backup. A full backup copies everything. An incremental backup copies only what changed since the last backup. Take a full backup first, then use incrementals as you get closer to the cutover.
How to verify backups before migration. Restore the backup to a test location and check that it works. Compare file counts and checksums:
bash
sha256sum backup.tar.gz
tar -tzf backup.tar.gz | head # confirm the archive is readable
Then import the database dump on a test server and run a few real queries.
5. Transfer Files, Databases, and Applications
Now the actual move begins. The key rule is to preserve permissions, ownership, and data integrity.
How to transfer files between servers with rsync. Rsync is a standard tool for this job. It copies only the differences, so you can run it many times. The first run is slow. Later runs are quick, which is what makes a low-downtime cutover possible.
bash
rsync -aHAX –numeric-ids –info=progress2 \
-e ssh /var/www/ user@NEW_SERVER_IP:/var/www/
The -a flag keeps permissions and timestamps. The -H, -A, and -X flags keep hard links, ACLs, and extended attributes. Be careful with trailing slashes on the paths, because they change what rsync copies. Do a dry run first with –dry-run.
How to migrate MySQL or PostgreSQL databases. For smaller databases, an export and import works well.
For MySQL, using mysqldump (see the official MySQL documentation):
bash
mysqldump –single-transaction –routines –triggers \
–databases shop_db > shop_db.sql
mysql < shop_db.sql # run on the new server
For PostgreSQL, using pg_dump (see the PostgreSQL docs):
bash
pg_dump -Fc shop_db > shop_db.dump
pg_restore -d shop_db shop_db.dump # run on the new server
Remember to recreate database users and permissions, and check that character sets and collations match.
For larger or busy databases, an export can take too long. In that case, use database replication so the new server stays in sync with the old one until cutover. Replication setup differs by database engine and version, so follow the official documentation for yours.
How to maintain data integrity. After copying, compare results instead of assuming success:
- Check file counts and total sizes on both servers.
- Compare checksums for key files.
- Compare row counts for important database tables.
- Run rsync again and confirm it reports no differences.
6. Test and Validate the New Server Environment
Don’t test only the home page. Use a structured approach. Establishing reliable deployment and staging workflows also helps teams identify configuration problems and validate application changes before introducing them into the production environment.
| Testing Area | What to Verify |
| Application | Pages load, forms submit, logins work |
| Database | Records are correct and queries run |
| Network | Ports, routing, and outbound connections |
| Security | Firewall, SSH, permissions, and SSL |
| Performance | CPU, RAM, disk I/O, and response times |
| Integrations | APIs, payment tools, and email |
| Backups | Restore works on the new server |
You can test the new server before changing DNS. Edit your local hosts file to point the domain at the new IP, or use curl:
bash
curl -I –resolve example.com:443:NEW_SERVER_IP https://example.com
Functional testing. Walk through real user journeys: sign up, log in, buy something, send a contact form.
Security testing. Confirm only the intended ports are open, SSL works, and file permissions are not too loose.
Performance and load testing. Compare response times with the old server under similar conditions. If the new server is slower, find out why before you switch.
Pre-launch testing checklist:
- [ ] Home page and key pages load over HTTPS
- [ ] Login, checkout, and forms work
- [ ] Database reads and writes succeed
- [ ] Emails send and arrive
- [ ] Cron jobs and background services run
- [ ] Third-party APIs connect from the new IP
- [ ] Logs show no repeating errors
7. Switch DNS and Move Traffic to the New Server
This is the cutover. Done well, users barely notice it.
How DNS propagation affects server migration. DNS records have a Time to Live (TTL) that tells resolvers how long to cache an answer. If your TTL is 24 hours, some users may reach the old server for a day after you switch. A day or two before cutover, lower the TTL to a short value such as 300 seconds (five minutes). Learn more about how DNS works if you need a refresher.
How to minimize downtime during DNS switching. Follow this order:
- Lower the TTL in advance.
- Run a final rsync and database sync.
- Put the old site in maintenance mode, or pause writes, for a short window.
- Run the last sync one more time.
- Update DNS records to the new IP.
- Check resolution and the live site.
bash
dig +short example.com
curl -I https://example.com
If you use a load balancer, you can shift traffic gradually instead. Move a small share to the new server first, watch for errors, then increase.
8. Monitor and Optimize the New Server
The migration is not over when DNS changes. The first few days tell you what testing missed.
Watch:
- CPU, memory, and disk usage
- Server and application logs
- Response times and error rates
- Database slow queries
- Network performance
Performance optimization after migration. Tune your web server workers, database buffers, and caching based on real traffic, not guesses.
Security hardening after migration. Remove temporary access you created for the move, rotate credentials that were shared during the project, keep the OS patched, and confirm backups are running on the new server.
Tools like Prometheus, Zabbix, and Nagios can alert you to problems early.
9. Keep a Rollback Plan and Decommission the Old Server
A rollback plan is your safety net. Keep the old server running, untouched, until you are confident.
When should you roll back? Decide in advance. Common triggers include data corruption, a payment flow that fails, or error rates that stay high after reasonable fixes.
The hard part of a rollback is data. If users placed orders on the new server, you can’t simply point DNS back to the old one. You must copy those changes back first, or you will lose them. This is why many teams freeze writes or keep a replication path open during the first hours.
When is it safe to shut down the old server? There is no universal number. Wait until you have run through at least one full business cycle (for example, month-end reports or weekly jobs), confirmed backups on the new server, and checked that no traffic still reaches the old one. Once the old infrastructure is no longer required, proper data center decommissioning helps businesses handle retired hardware, secure data destruction, asset tracking, and responsible equipment disposal. Take a final backup, then decommission it and securely wipe the disks.
Server Migration Checklist: Before, During, and After
Copy this list into your project notes.
Pre-Migration Checklist
- [ ] Document the existing infrastructure
- [ ] Map application dependencies
- [ ] Choose and size the destination server
- [ ] Check software compatibility
- [ ] Create full backups and test a restore
- [ ] Lower DNS TTL
- [ ] Write the timeline and rollback plan
- [ ] Notify stakeholders
During Migration Checklist
- [ ] Prepare and secure the new server
- [ ] Transfer files and databases
- [ ] Verify permissions and ownership
- [ ] Run final incremental sync
- [ ] Test the application on the new server
- [ ] Confirm security settings
Post-Migration Checklist
- [ ] Update DNS records
- [ ] Verify the site over HTTPS
- [ ] Test database connections
- [ ] Check SSL certificates
- [ ] Review logs and performance
- [ ] Confirm integrations and email
- [ ] Confirm backups on the new server
- [ ] Decommission the old server when safe
Best Tools for Server Migration
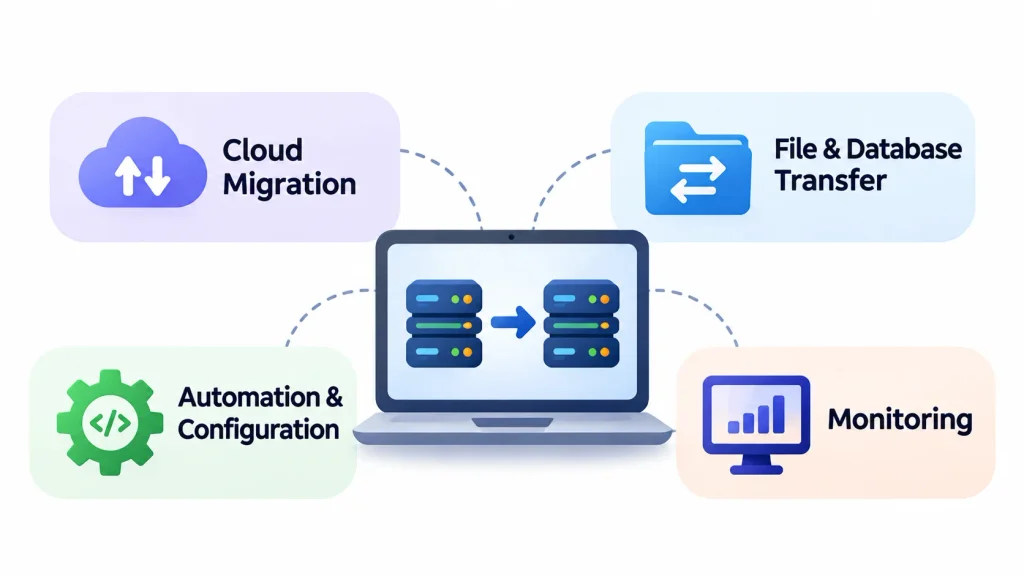
Choose tools based on the job, not popularity.
| Tool | Best For | Environment |
| AWS Application Migration Service | Moving servers into AWS | Cloud (AWS) |
| Azure Migrate | Assessing and moving workloads to Azure | Cloud (Azure) |
| Google Cloud Migration Center | Cloud migration planning | Cloud (Google Cloud) |
| rsync | File sync between Linux servers | Linux, macOS |
| Robocopy | File copy on Windows | Windows |
| mysqldump / pg_dump | Database export and import | MySQL / PostgreSQL |
| Ansible | Repeatable server configuration | Mixed |
| Prometheus / Zabbix | Monitoring after the move | Mixed |
For cloud moves, rely on each provider’s official documentation, since services and features change often. For example, start with the AWS Application Migration Service page.
For real-world opinions, the sysadmin community on Reddit is a useful place to see how administrators talk about migration problems. Treat it as anecdotal input and verify advice before using it.
Common Server Migration Challenges and How to Avoid Them
| Challenge | Common Cause | How to Prevent It |
| Unexpected downtime | Long final sync or DNS delays | Lower TTL, sync early, plan a short cutover window |
| Data loss or corruption | Untested backups, writes during copy | Verify backups, freeze writes, compare checksums |
| Compatibility issues | Different software versions | Match versions and test on staging |
| DNS and network errors | Wrong records, blocked ports | Document records, test with curl –resolve |
| Security gaps | Open ports, shared credentials | Harden first, rotate credentials after |
| Not enough resources | Undersized new server | Base sizing on real usage data, with headroom |
| Rushed timelines | No buffer for surprises | Add extra time and a clear rollback point |
Most failures trace back to one thing: skipped preparation. The fixes are usually boring, such as better notes and one more test.
How to Migrate a Server Without Downtime
True zero downtime is hard. It depends on your application, how often data changes, and your infrastructure. What you can do is cut the interruption to seconds or minutes, and sometimes to none.
Use replication to synchronize data. Keep the new database as a replica of the old one until cutover, so little data needs to move at the end.
Set up a staging environment. Test on a full copy of the new setup first, so surprises appear before users see them.
Use load balancers for traffic distribution. Send a small percentage of traffic to the new server, check for errors, then move more.
Perform incremental data synchronization. Run rsync repeatedly. Each pass is faster than the last.
Schedule the final cutover during low-traffic hours. Fewer users means fewer lost transactions and less pressure.
Maintain a rollback and failover strategy. Keep the old server ready, and know exactly how data would flow back if you need to revert.
What Should You Check After a Website Server Migration?
If the server hosts a public website, a migration can quietly hurt search visibility. Check these items right after the cutover.
Verify website accessibility and HTTP status codes. Key pages should return 200. Old redirects should still return 301. Watch for unexpected 404 or 5xx errors.
Check SSL certificates and HTTPS configuration. Make sure the certificate is valid, covers all hostnames, and renews automatically.
Verify robots.txt and XML sitemaps. A staging robots.txt that blocks crawlers is a classic mistake. Confirm both files are reachable and correct.
Check canonical tags and redirects. Confirmed canonicals point to the right URLs and there are no redirect loops or long chains.
Monitor Google Search Console. Watch the Pages and Crawl stats reports for new errors in the days after the move.
Check website speed and Core Web Vitals. A new server can be faster or slower than the old one. Measure it.
Monitor crawl errors and indexing issues. If errors appear, fix them quickly. Search engines recheck pages regularly, but long outages can cause problems.
How Long Does Server Migration Take?
It depends. A small website can move in a few hours. A large database-driven system with many dependencies can take weeks or months once you include planning and testing.
Factors That Affect Server Migration Time
- Total data size
- Network bandwidth between servers
- Database size and complexity
- Number of applications and dependencies
- Migration method (copy, rebuild, or replication)
- Testing and approval requirements
How to Create a Realistic Migration Timeline
For a small site like our example, a sensible sequence looks like this:
| Phase | Typical Work |
| Days before | Assessment, planning, new server setup, TTL change |
| 1–2 days before | Backups, first full transfer, staging tests |
| Cutover window | Final sync, DNS change, live checks |
| Days after | Monitoring, fixes, old server kept as a fallback |
Treat this as a starting point, not a promise. Enterprise migrations need more phases, more teams, and more testing time. Always add a buffer.
Server Migration Best Practices
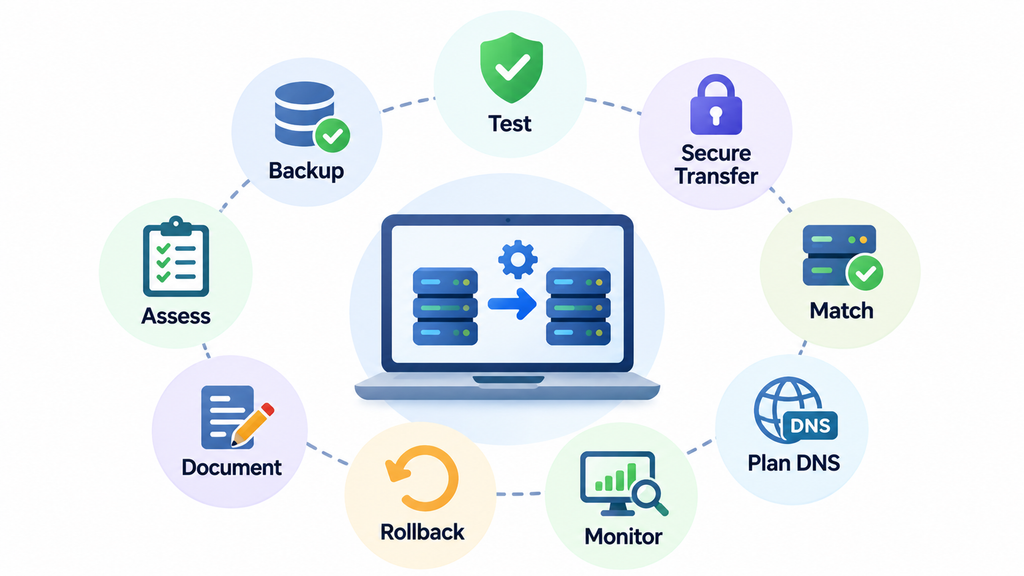
- Assess your existing infrastructure first. Before starting the migration, understand your current server environment, including hardware specifications, operating systems, applications, databases, network configurations, and dependencies. A proper assessment helps identify compatibility issues and prevents unexpected problems during migration.
- Verify backups before migration. Create complete backups of important files, databases, applications, and server configurations. Don’t just assume that your backups are working. Restore them in a test environment to confirm that the data is accessible and can be recovered if something goes wrong.
- Match the destination server with your requirements. Ensure the new server has sufficient CPU, RAM, storage, and bandwidth to handle your existing workloads. Also, check operating system versions, software dependencies, database compatibility, and application requirements before transferring anything.
- Test the new environment in multiple layers. Don’t limit testing to checking whether the server is online. Verify application functionality, database connections, network connectivity, security settings, server performance, and third-party integrations. Thorough testing helps identify issues before the new server handles live traffic.
- Plan DNS changes carefully. Review your existing DNS records and lower the Time to Live (TTL) value before migration to help reduce the time users may continue resolving the old server address. Plan the DNS update, verify the new IP address, and monitor propagation to ensure traffic reaches the correct destination.
- Monitor the server closely after migration. Keep a close eye on CPU usage, memory consumption, disk space, network activity, application response times, and server logs. Pay particular attention during the initial days after migration, as some compatibility, performance, or configuration issues may only become visible under real workloads.
- Prepare a rollback strategy in advance. Define the conditions that would require reverting to the previous server. Keep the old environment available until the new server is stable, maintain verified backups, and establish how database changes and user activity will be handled if rollback becomes necessary. This reduces recovery time and limits potential data loss.
- Document every migration activity. Maintain records of server configurations, transferred files, database changes, DNS updates, security settings, testing results, and issues encountered. Proper documentation makes troubleshooting easier, supports future maintenance, and helps teams perform subsequent migrations more efficiently.
Frequently Asked Questions About Server Migration
What Are the Essential Steps in Server Migration?
Assess the current server, build a plan, prepare the new server, back up your data, transfer everything, test, switch DNS, monitor, and keep a rollback option until you are sure the move succeeded.
How Do You Migrate Data From One Server to Another?
Use a secure transfer tool such as rsync over SSH for files, and a database export (or replication) for databases. Preserve permissions, then compare checksums and record counts to confirm nothing was lost.
How Can You Migrate a Server Without Downtime?
Keep the old server live while you sync data to the new one. Use replication or repeated incremental syncs, lower DNS TTL, test on staging, and cut over during a quiet period. Zero downtime isn’t guaranteed in every setup, but short interruptions are achievable.
What Are the Biggest Risks of Server Migration?
The main risks are downtime, data loss or corruption, software incompatibility, DNS mistakes, and security gaps. Verified backups, thorough testing, and a clear rollback plan reduce all of them.
What Should You Do After Completing Server Migration?
Check DNS and HTTPS, test database connections and integrations, review logs, and monitor performance. Confirm backups run on the new server, then retire the old server only after a safe waiting period.
Conclusion
Good migrations are quiet. Nothing dramatic happens, because the hard work was done earlier.
The essential server migration steps all point to the same idea: prepare thoroughly, prove the new server works, and keep a way back. Verified backups protect your data. Compatibility checks prevent surprises. Testing and monitoring catch what you missed.
Before you switch production traffic, run through the checklist above one more time. That five minutes can save you a very long night.